Tracking Contact Form 7 Conversions
On This Page
Conversions Overview
Each client is going to have different goals. Some clients will consider a phone call the most important action a user can take on their site while others will think a contact form is more important. Because of this, I’m going to show you how to track them the top ones. You can choose to include or exclude any of them from your SEO strategy.
Contact Form 7
If the site is using the Contact Form 7 plugin for forms, you can take the steps below to track successful form submissions in Google Analytics.
Create Google Tag Manager Account
Before you install the plugin, you will need to create a free Google Tag Manager account. Then you will need to get your Google Tag Manager ID.

Install Google Tag Manager Plugin
If you are using Contact Form 7 and would like to track conversions I recommend using a plugin called Google Tag Manager for WordPress.
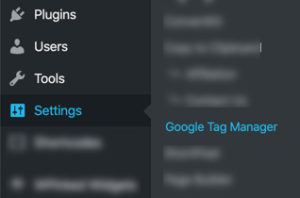
After installing the plugin in WordPress, on the left hand side click on “Settings” and then “Google Tag Manager”.
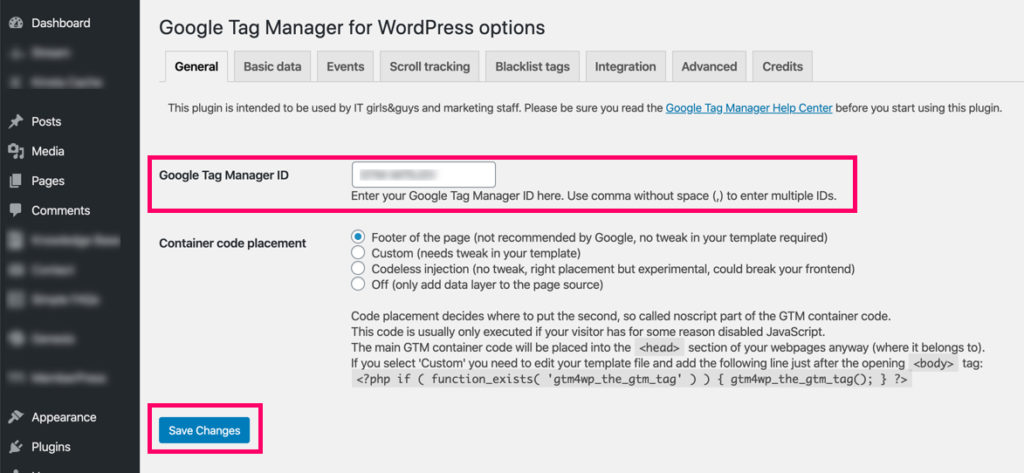
In the “General” tab enter your Google Tag Manager ID and click “Save Changes”.
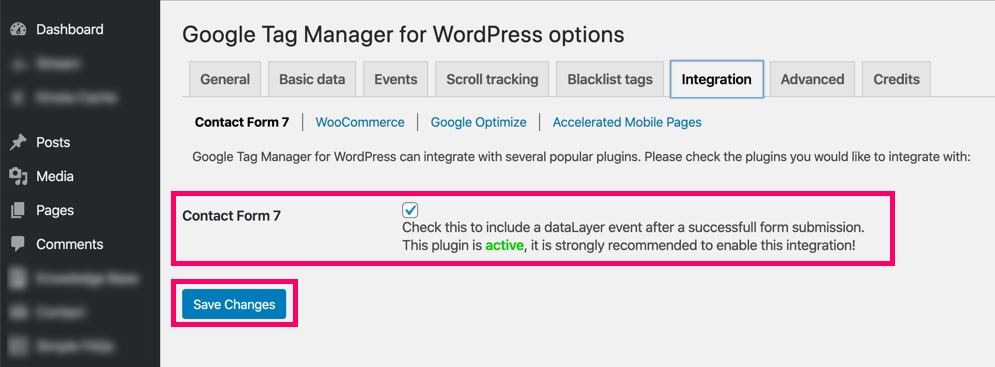
Then click on the “Integration” tab and check the Contact Form 7 box.
Import Google Tag Manager Container
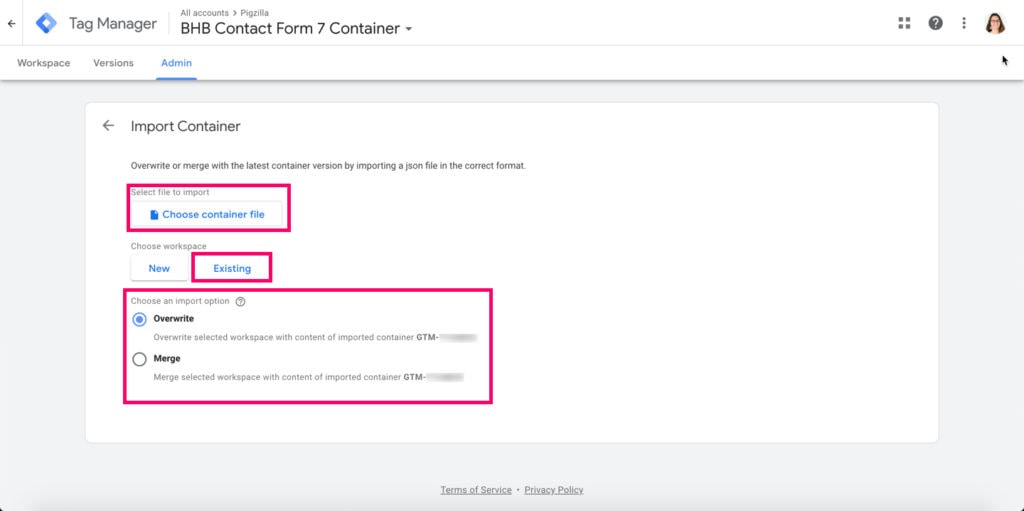
Now you will need to log into Google Tag Manager and import a Container. In GTM, click on “Admin” then “Import Container”.

Download this GTM Container. Download GTM Container
Next, under “Choose Container File” upload the GTM Container file that you just downloaded.
Under “Choose Workspace” you most likely will choose “Default”.
Under “Choose an Import Option” choose “Overwrite” if you don’t have anything in your GTM container yet. If you already have some tags and triggers set up in GTM, you may want to choose “Merge”.
Replace Google Analytics Tracking ID
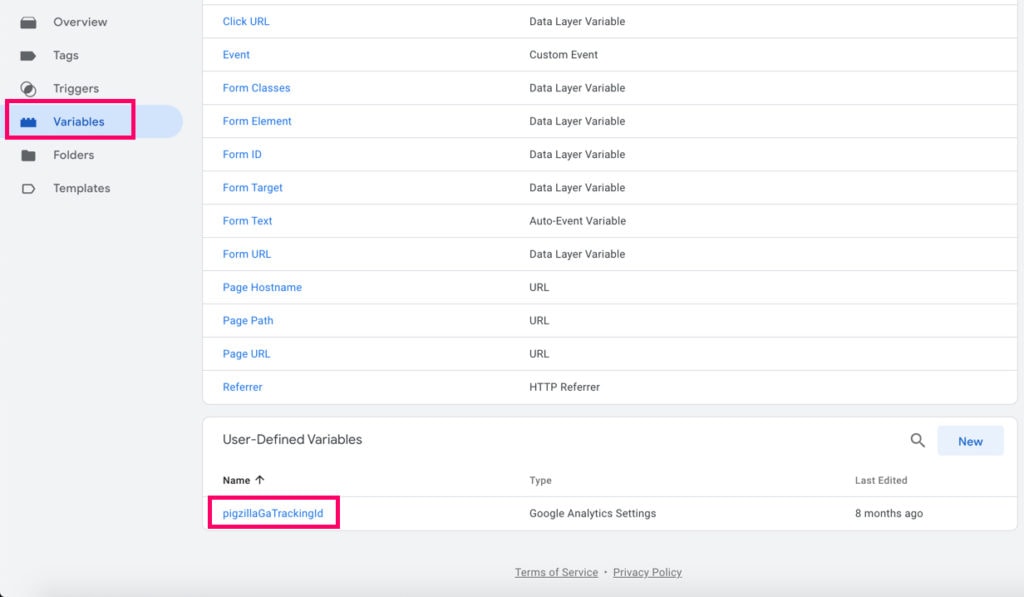
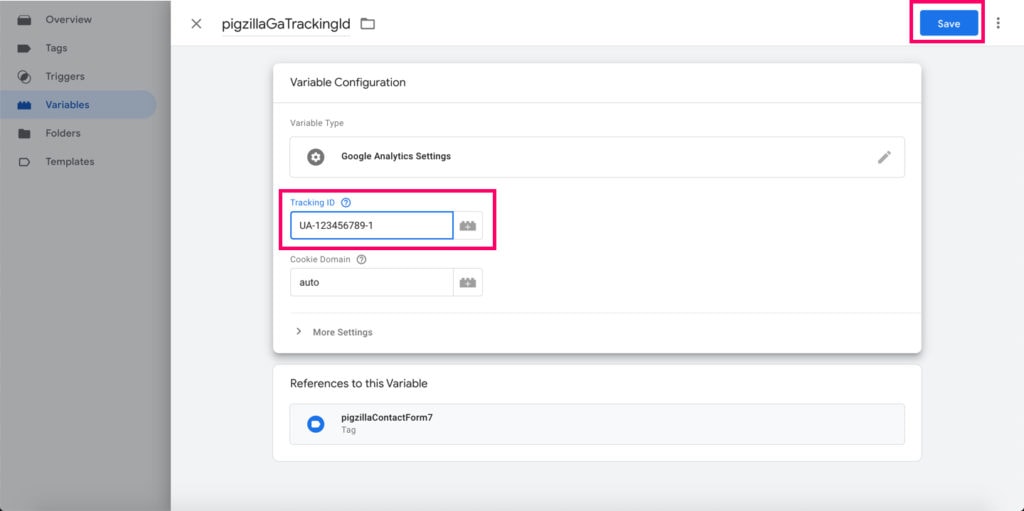
This is a super important step. Don’t forget to replace the Google Analytics ID in the GTM Container with your Google Analytics ID. This tells GTM where to send the event data.
Publish Changes in GTM
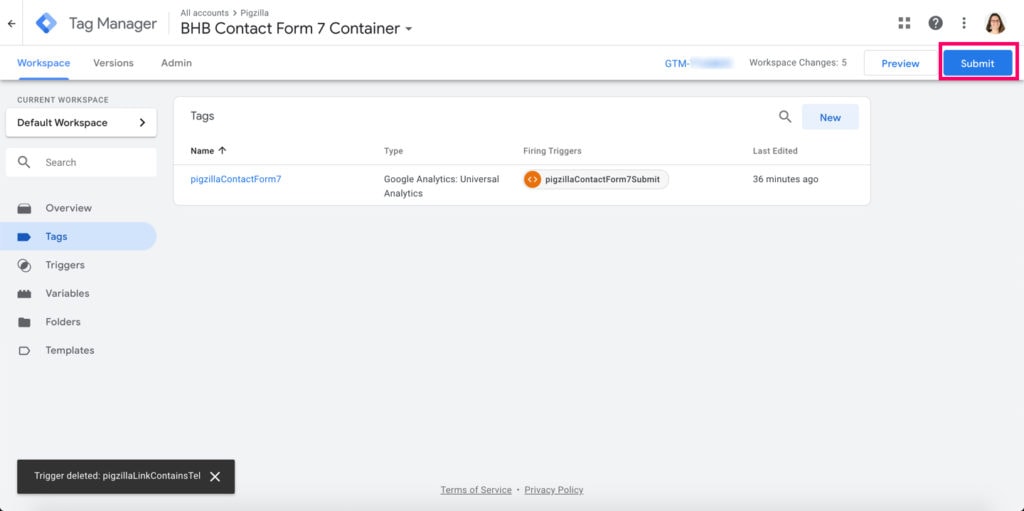
Make sure to submit and publish your changes in Google Tag Manager.

Contact Form 7 Goals in Google Analytics
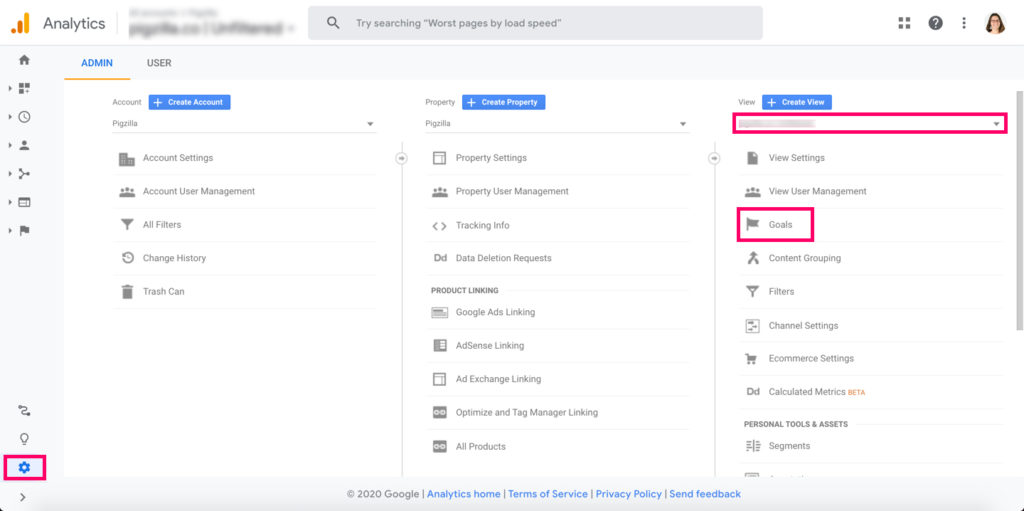
Now that you have the event set up, we need to create a goal in Google Analytics. In Google Analytics, click on “Admin” and then select the “View” that you’d like to set up the goal in. Then click on “Goals”.
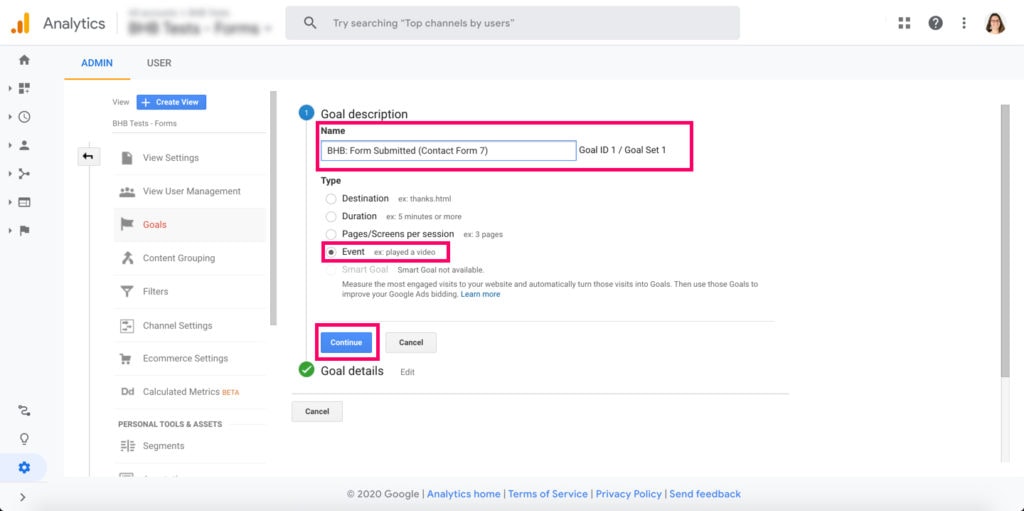
Select “New Goal”. Name your goal something that you would easily recognize. Under “Type” choose “Event”.
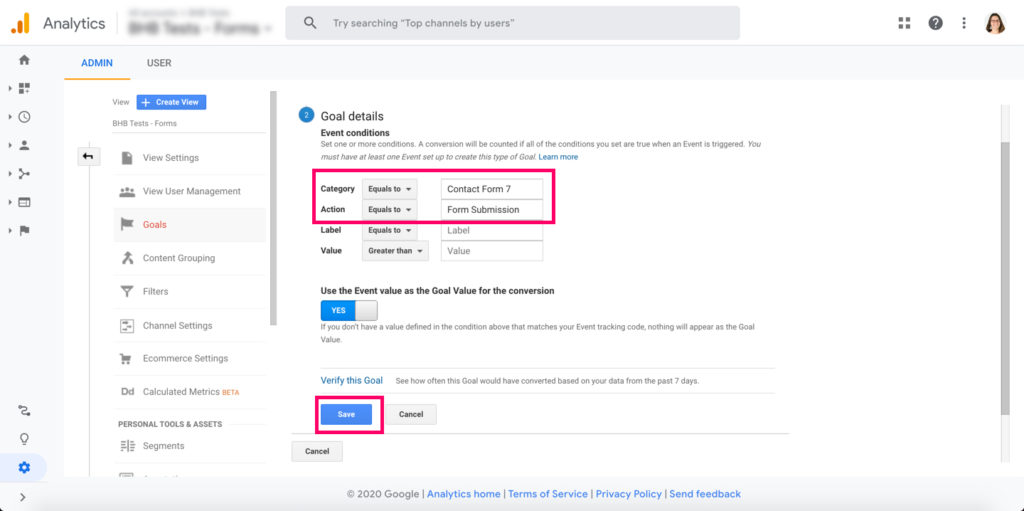
In the “Category” field enter “Contact Form 7”. In the “Action” field enter “Form Submission”. These fields are case sensitive and need to match the event data in Google Tag Manager exactly. In the GTM container that you imported, here is how I set the event data up:
- Category: Contact Form 7
- Action: Form Submission
- Label: {{Page URL}}
If you don’t want to create the Goal in Google Analytics manually you can import the Google Analytics goal here: Import Google Analytics Goal
Testing the Events and Goals in Google Analytics
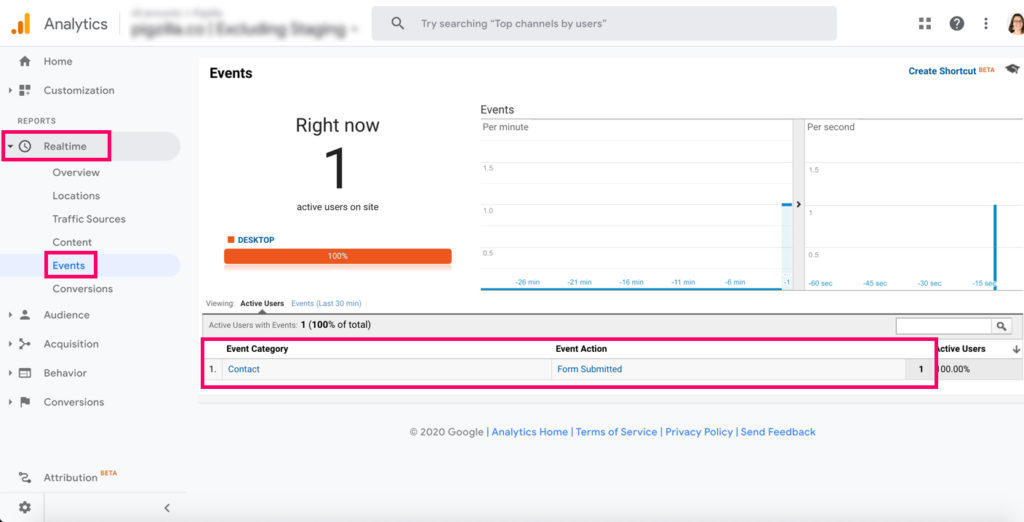
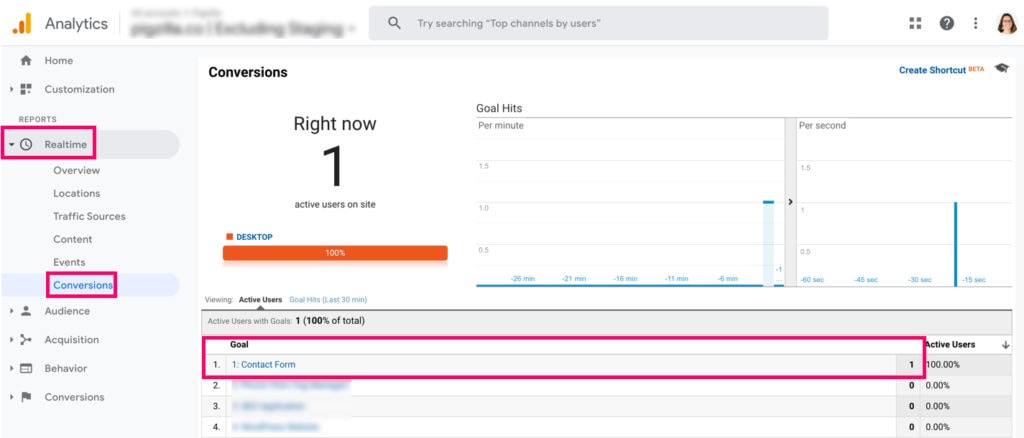
Now go back into Google Analytics and click on the “Real-Time” tab on the left side. This shows if any users are currently on the site.
Submit a Contact Form 7 form on the site as a test. You can click on the “Events” tab under “Real-Time” to see if it’s event data is being sent to Google Analytics from Google Tag Manager. You can click on the “Conversions” tab under “Real-Time” to see if the Goal you just set up is working.
If they both are working fine, then you are all done!
