Installing Google Analytics (Universal Analytics)
On This Page
I recommend reading our guides on installing GA4 for the first time and migration from UA to GA4.
Video Walkthrough
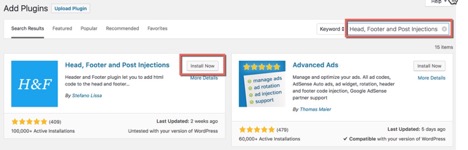
Install the “Head, Footer and Post Injections” plugin
In WordPress click on “Plugins”, then “Add New”, then search for “Head, Footer and Post Injections”. Click “Install Now”, the “Activate”.
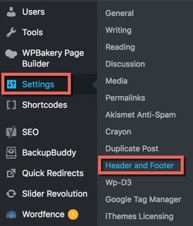
To access the plugin, click on “Settings”, then “Header and Footer”

Log into https://analytics.google.com/
Get Google Analytics Tracking Code
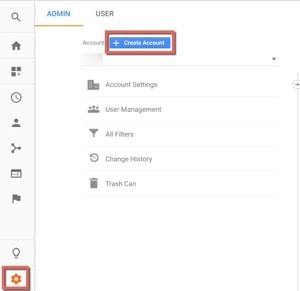
If the client does not have Google Analytics set up at all for them yet, click on the gear icon at the bottom, then “Create Account”
After you fill in all the fields, click “Get Tracking ID”
You will need to copy the Google Analytics tracking code. We are going to paste it into the WordPress plugin.
![]()
After you have copied the Google Analytics tracking code, go back into WordPress and click on “Settings”, then “Header and Footer”
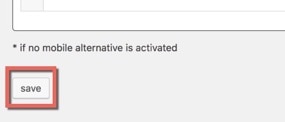
Paste the Google Analytics tracking code into the box that says “HEAD PAGE SECTION, INJECTION ON EVERY PAGE.”
![]()
DON’T FORGET TO SCROLL DOWN AND CLICK SAVE
Test The Google Analytics Tracking Code
Now go back into Google Analytics and click on “Real-Time”. This shows if any users are currently on the site. Visit a specific page and remember the URL. You can click on the “Content” tab under “Real-Time” to see if it’s tracking you properly. If it is, then you are all done!
