XML Sitemap
On This Page
It’s crucial that Google can find all the pages on your site that you want indexed. Just because a page exists does not mean Google can find it. If it’s not linked to on your site from a page Google knows about, Google may not be able to find it. That’s why an XML sitemap is used. It contains a list of all pages on your site that you want Google to crawl and index.
Create an XML Sitemap
There are many tools you can use to create an XML sitemap. I love using Yoast’s free SEO plugin for this.
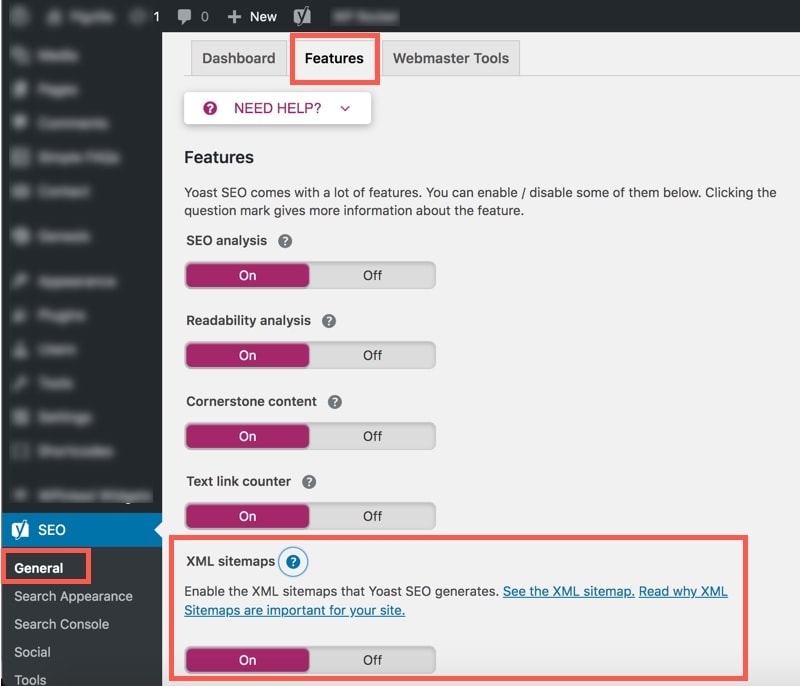
Once you have installed the plugin and configured it, you can confirm the XML sitemap feature is on by going to the “General” tab and then the “Features” tab. You can also view the XML sitemap here.
It can also be found by adding /sitemap_index.xml to the end of your home page URL.
Example: https://www.pigzilla.co/sitemap_index.xml

Removing Pages from The XML Sitemap
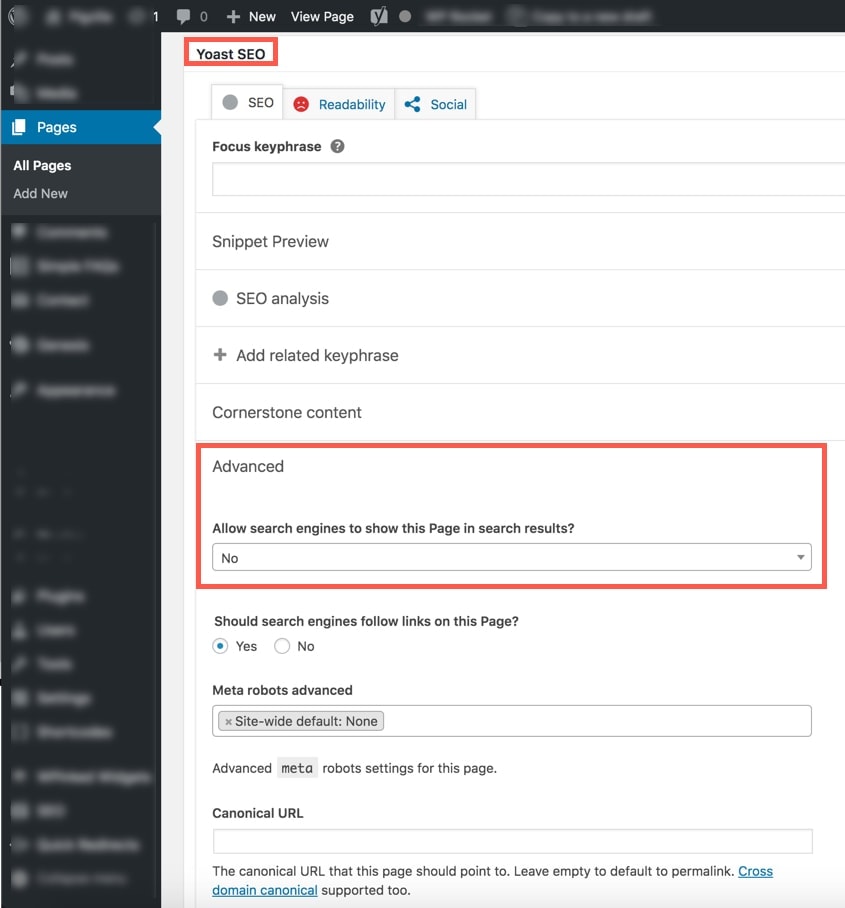
On individual pages, you can control whether or not Google will index a page. When editing a page, scroll down to the “Yoast SEO” section. Under the “Advanced” section you can choose either “Yes” or “No” to “Allow search engines to show this Page in search results?”

If you choose “No”, Yoast will add the noindex meta tag to the page like so:
<meta name=”robots” content=”noindex, follow”>
If you use the Yoast SEO plugin to noindex a page, it will automatically be removed from the XML Sitemap.
Submit The XML Sitemap to Google
After you have created your XML sitemap you’ll need to submit it to Google in Google Search Console.
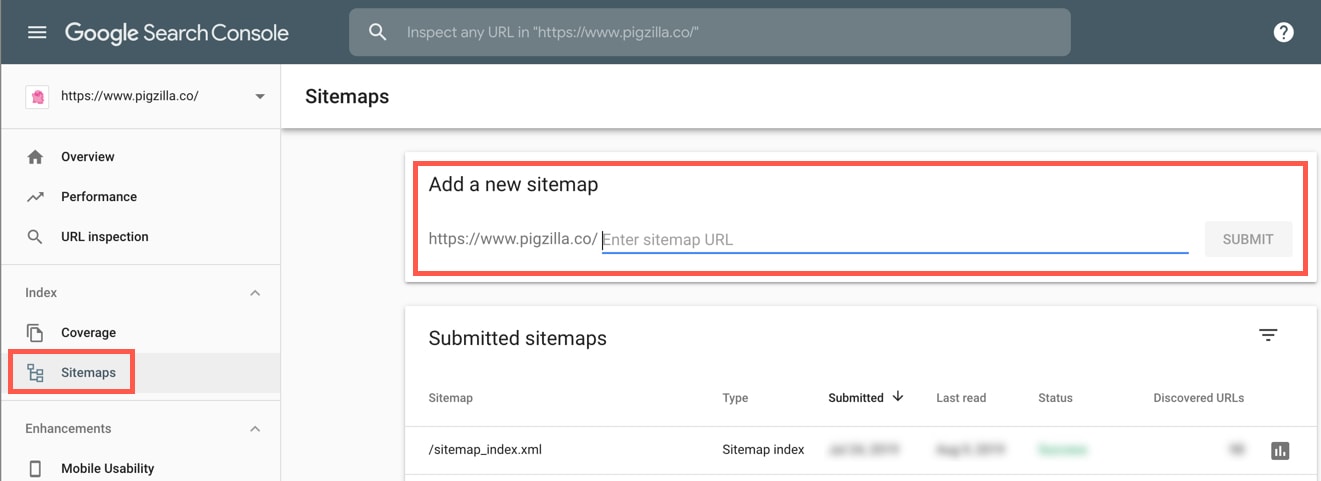
In Google Search Console, click on the “Sitemaps” tab. In the “Add a new sitemap” area, add the XML Sitemap path. Most likely this will be sitemap_index.xml or sitemap.xml.

