When we first started out creating WordPress websites it was very difficult to find out how to make small changes like font type, size and color. Some themes have simple options built into them so that you can easily make a change to font size or color. But what if the theme you are using doesn’t have these options set up for you already? Or what if the theme options are limited to only a few font sizes and colors? This simple tutorial will show you how you can work around this using the Simple Custom CSS plugin. Any code that you paste into this plugin will override your theme’s CSS.
1. Use Google Chrome as your web browser. If you don’t use Chrome then you will have to download and install it for free here: https://google.com/chrome/.
2. Download and install the free Simple Custom CSS Plugin for your WordPress website. I recommend installing it from within the WordPress admin but here is the link in case you need it: https://wordpress.org/plugins/simple-custom-css/.
3. Open your website in Chrome. Go to the page that has the font on it that you want to edit.
4. Highlight the font and then right-click on it. Select “Inspect Element”. A window will pop up showing “Elements” and “Styles”. Under the “Elements” section you will see the text that you want to edit. It may be wrapped in an “h1” tag or a “p” tag. In this example, the text is wrapped in an “h2” tag.
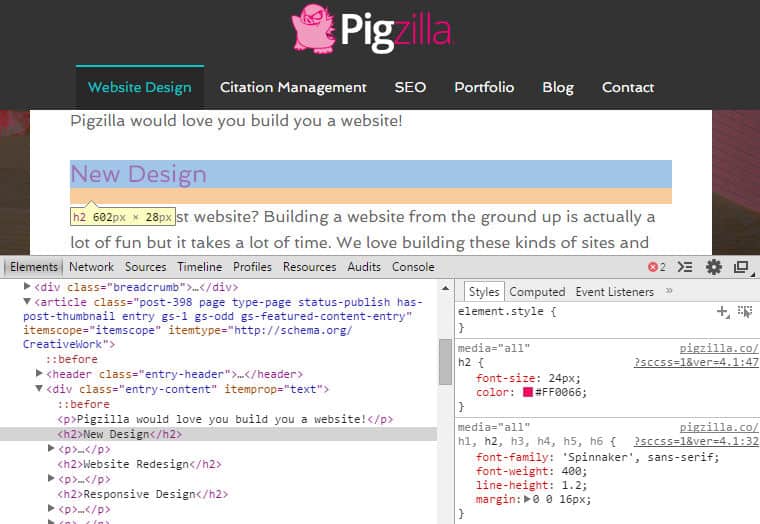
5. Look under the “Styles” tab for the “h2” style info such as “font-size”, “color” and “font-family”.
6. Copy the code under the “Styles” tab starting with “h2 {” and ending with “}”.

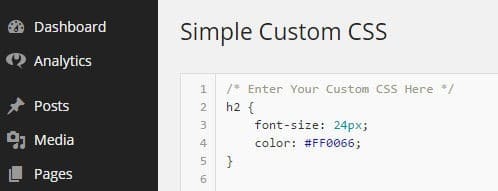
7. Go into your WordPress admin and select “Appearance” and then “Custom CSS”. This will open up the settings for the Simple Custom CSS plugin.

8. Paste this code into Simple Custom CSS.
9. Now you can edit the font size here. Change the font size to whatever you want. For example, change 24px to 28px.
10. To edit the font color change the hex code from #FF0066 to whatever you want. If you don’t know the hex color code that you need you can use this link to help you find it: https://w3schools.com/colors/colors_picker.asp.
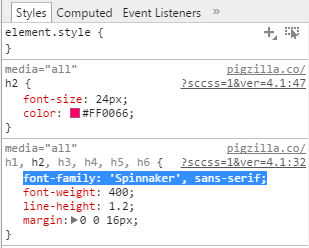
11. If the code that you copied and pasted didn’t include “font-family” and you want to change the font type you can go back to Chrome and inspect the element again. Copy and past the code from the “Styles” tab that contains “font-family” for the “h2”.
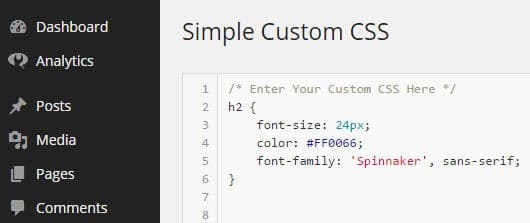
12. Paste this code into Simple Custom CSS between “h2 {” and “}” as well. If you don’t know what font type you want to change it to, you can take a look at some fonts here: https://w3schools.com/cssref/css_websafe_fonts.asp.
13. You can remove any unnecessary code that isn’t changing.
14. Don’t forget to click on “Update Custom CSS” in the plugin or your changes won’t be saved.
Note: If you made changes to the “h2” style, then any text that is wrapped in the “h2” anywhere on your site will be updated with these changes.